
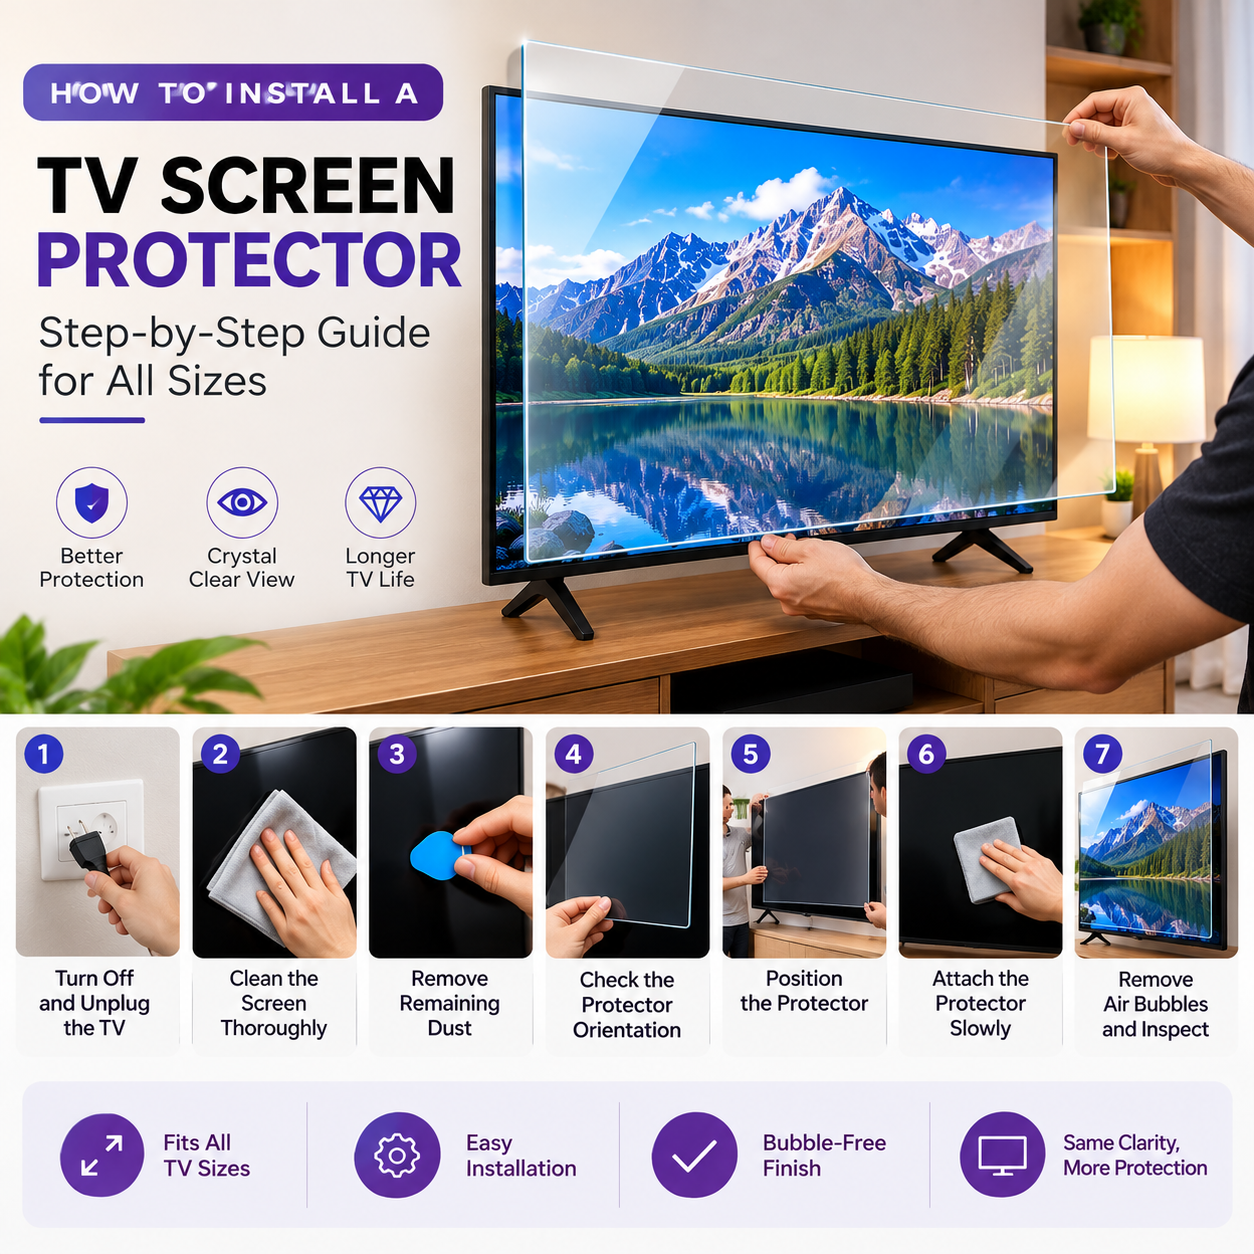
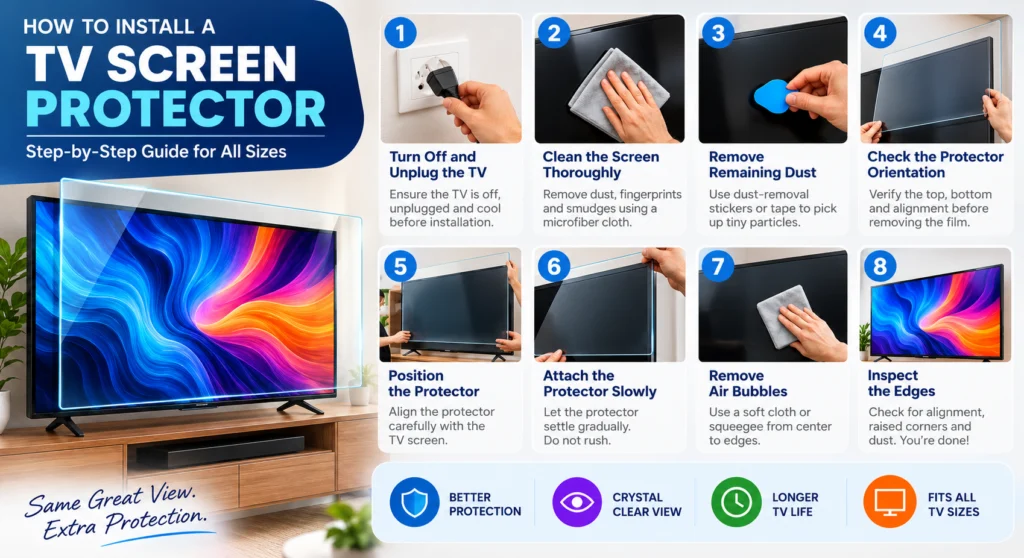
How to Install a TV Screen Protector — Step-by-Step Guide for All Sizes
Installing a TV screen protector is easier than most people expect — but it is also easier to get wrong than a phone screen protector.
The difference in size matters. A 55 inch screen protector is not just a scaled-up version of a phone protector. The surface area is enormous, dust behaviour is different, alignment requires more attention, and two people make the process significantly easier than one.
This guide covers everything — preparation, tools, the exact installation steps for each size, how to handle bubbles, and how to remove the protector if you ever need to. Follow it in order and your screen protector will go on flat, clear, and bubble-free the first time.
What You Need Before Starting
Included in your Screen Guardian box:
- Screen protector film (precision-cut for your TV size)
- Microfibre cleaning cloth × 1 (or × 2 for 75 inch)
- Installation guide card
You do not need:
- Any tools
- Water or cleaning solution
- A second cloth (unless you are doing 75 inch)
- A hair dryer or heat gun
- Any adhesive
Screen Guardian protectors use static cling — no glue, no tape, no liquid. The electrostatic charge in the film holds it to your TV panel. This also means if you make a mistake during installation, you can lift the film and try again without damaging anything.
Preparation — The Most Important Part
Most installation problems — bubbles, dust, misalignment — happen before the protector even touches the screen. Preparation eliminates 90% of installation issues.
Step 1 — Turn your TV off at the wall
Switch off at the wall socket — not just standby mode. A TV in standby generates residual heat and static charge that attracts dust particles to the screen surface. Off at the wall for 10 minutes gives you a cool, neutral surface.
This single step makes a bigger difference than any other preparation step.
Step 2 — Choose the right room
Work in the lowest-dust environment available. Dust is the primary enemy of bubble-free installation — one microscopic particle on the screen surface under the film creates a visible bubble.
Best option: A bathroom after running a hot shower for 2 minutes with the door closed. The steam settles all airborne dust particles. Switch the shower off, wait 60 seconds, then start installation in the settled, low-dust air.
Second best: A bedroom with windows closed and ceiling fan off. No cooking, no sweeping, no pets in the room during installation.
Avoid: Living rooms with ceiling fans running, kitchens, or rooms where someone has recently swept or dusted.
Step 3 — Do not touch the screen surface after cleaning
Once you wipe the screen (Step 4 below), do not touch it. Do not sneeze near it. Do not walk past it quickly. Any contact or air disturbance after cleaning and before applying can deposit dust or fingerprints that create bubbles.
Step 4 — Clean the screen
Take the included microfibre cloth. Starting from the top of the screen panel, wipe downward in a single stroke to the bottom. Repeat once from left to right across the full width.
Do not:
- Use circular motions — this moves dust around rather than removing it
- Use water, glass cleaner, alcohol, or any liquid directly on the TV panel
- Use paper towels, cotton cloth, or T-shirt material — these leave fibres
- Press hard — light pressure is sufficient
The screen is now clean. Move immediately to the next step.
Installation — By TV Size
Installing a 32 or 43 Inch TV Screen Protector (Solo Installation)
32 and 43 inch protectors are manageable for one person. The smaller size gives you more control during alignment.
Step 1 — Peel the backing Hold the protector horizontally with both hands at the outer edges. Do not touch the inner surface — fingerprint oils on the inner surface create permanent adhesion spots. Peel the backing film slowly from one corner using a fingernail.
Step 2 — Align the top edge Hold the protector horizontally at the top of the TV — aligning to the screen panel edge, not the bezel frame. The bezel (the plastic border around the screen) adds 10–20mm to the apparent edge of the screen. Look for the actual glass surface — the protector aligns to the glass, not the plastic.
Stand directly in front of the TV and confirm the protector is level. Left-right balance is easier to check from the front before releasing.
Step 3 — Apply from top to bottom Lower the protector slowly from the top edge downward. The static cling will pull the film toward the panel as it gets close — this is normal. Do not fight it. Let the film fall naturally.
Do not drop the protector flat all at once — a controlled top-to-bottom lowering pushes air out toward the bottom edge rather than trapping it in the middle.
Step 4 — Smooth from centre outward Take the microfibre cloth flat and place it in the centre of the screen. Apply gentle, firm pressure and smooth outward toward the right edge. Return to centre and smooth toward the left edge. Then centre to top and centre to bottom.
Work slowly. Each pass should be deliberate — about 3 seconds per stroke. Rushing pushes bubbles to the edges but leaves micro-bubbles in the middle.
Repeat the full smoothing sequence three times.
Installing a 55 Inch TV Screen Protector (Two-Person Recommended)
At 55 inches, solo installation is possible but two people make it significantly cleaner. The larger film area means alignment drift is more likely and dust exposure during the 30–60 second application window is higher.
Person 1: Holds the protector during alignment and lowers it. Person 2: Confirms left-right alignment from the front and watches for the bottom edge.
Step 1 — Peel the backing Person 1 holds the protector at the outer edges. Peel the backing from one corner. Person 1 holds the top edge, Person 2 supports the bottom edge lightly — do not grip the inner surface.
Step 2 — Align Person 1 raises the protector to the top of the screen panel. Person 2 stands 1 metre in front of the TV and confirms equal distance from the left and right bezel edges. Call out adjustments — “move left 1cm”, “raise slightly” — until the top edge is correctly centred.
Step 3 — Apply Person 1 lowers the protector from top to bottom at a steady pace — about 3 seconds for the full height. Person 2 watches the bottom edge for alignment drift and calls corrections.
The static cling takes hold as the film contacts the panel. Once the top 30% is down, the film will pull itself flat — this is normal.
Step 4 — Smooth Both people can smooth simultaneously from opposite sides toward the centre, then from the centre outward. Same technique as 43 inch — flat cloth, firm gentle pressure, centre to edge. Three full passes.
Installing a 65 or 75 Inch TV Screen Protector (Two-Person Required)
At 65 and 75 inches, two-person installation is required for best results. The film is large enough that solo alignment almost always results in drift or dust ingress during the extended application window.
Additional preparation for 75 inch: The 75 inch box includes two microfibre cloths. Use cloth 1 for the pre-installation screen cleaning. Keep cloth 2 clean for post-installation smoothing. A fresh cloth for smoothing eliminates the risk of re-depositing any dust or oils that cloth 1 picked up during cleaning.
Step 1 — Peel backing Person 1 holds the top edge of the protector. Person 2 holds the bottom edge. Peel the backing from the middle — one person peeling from each side simultaneously reduces handling time and static build-up.
Step 2 — Position at top of screen Both people raise the protector to the top of the screen panel simultaneously. Person 1 aligns the top edge. A third person confirming from the front makes this easier — but two people can manage by having Person 2 step back briefly to check alignment before the film contacts the panel.
Step 3 — Apply — top to bottom Person 1 holds the top edge in contact with the panel. Person 2 lowers the bottom edge slowly. The film falls flat under its own weight and static cling.
For 75 inch specifically — work in a room with zero air movement. Ceiling fans off, windows closed, air conditioning on low rather than high fan speed. The larger film surface is more susceptible to air turbulence during application.
Step 4 — Smooth — both sides simultaneously Person 1 smooths the left half of the screen from centre to left edge. Person 2 smooths the right half from centre to right edge. Then both smooth from centre to top, then centre to bottom. Three full passes each.
Dealing With Bubbles After Installation
Small bubbles — under 5mm, soft edges
These are normal and will disappear on their own within 24–48 hours as the static cling fully settles. Do not press them, do not lift the protector. Leave them alone.
Large bubbles — over 5mm, hard defined edges
These are caused by dust trapped under the film. They will not disappear on their own.
Fix: Lift the protector from the corner nearest to the bubble. Look at the screen surface under direct light — you will see a dust particle. Wipe it away with the microfibre cloth. If the dust is on the inner surface of the protector, blow it gently away from 15cm distance. Re-apply.
Fingerprint haze — irregular soft patch
Caused by touching the inner surface during installation. Lift the protector. Tap the affected area lightly with a clean dry microfibre cloth to absorb the oil. Re-apply.
See our full bubble troubleshooting guide: How to Remove Air Bubbles from a TV Screen Protector
How to Remove a TV Screen Protector
Removing a Screen Guardian protector is straightforward because there is no adhesive.
Step 1 — Find a corner Use a fingernail or a soft card (credit card works well) to lift one corner of the protector. Start at a corner — not the middle of an edge — for the easiest peel start.
Step 2 — Peel slowly Peel at a low angle — about 30–45 degrees from the screen surface. Peeling at a sharp angle (90 degrees) can create static that attracts the film back to the panel. Slow and low is the correct technique.
Step 3 — Support the film as you peel As the protector peels away from the screen, support it with your other hand so it does not fold back on itself. A folded protector may crease and become unusable for re-application.
Step 4 — Check the screen surface After removal, inspect the screen under direct light. You should see no residue — static cling leaves nothing behind. If you see any marks, they were on the screen before installation and were under the protector, not caused by it.
Can the protector be re-used after removal? Yes, if it was removed carefully without creasing or tearing. Clean any dust from the inner surface before re-applying.
Installation Tips by TV Brand
Samsung QLED and Neo QLED Samsung’s anti-reflective QLED coating is very smooth — the protector aligns and seats flat with minimal effort. The coating is also sensitive to fingerprints, so keeping the microfibre cloth between your hand and the film during smoothing is important.
LG OLED (C-series, G-series) LG OLED panels have a flat, glossy surface that the static cling bonds to very evenly. Installation is straightforward. The G-series Gallery OLED is wall-mounted — ensure the TV is firmly mounted before installation and work on the wall rather than removing the TV.
Sony Bravia (X-series and A-series OLED) Sony panels have a slightly different anti-reflective coating texture. The protector aligns cleanly. For the A-series OLED with Acoustic Surface Audio, the film will vibrate slightly when audio is playing — this is normal and does not affect adhesion.
TCL QLED and Mi TV Standard installation applies. TCL and Mi TV panels have no unusual surface characteristics — the process is identical to Samsung LED panels.
Frequently Asked Questions
How long does installation take? 10 minutes for 32–43 inch (solo). 10–15 minutes for 55 inch (two people). 15–20 minutes for 65–75 inch (two people). First-time installers should add 5 minutes for setup and preparation.
Do I need to turn the TV off to install? Yes — off at the wall, not standby. A running TV generates static and heat that attracts dust during installation.
Can I install it on a wall-mounted TV? Yes. Wall-mounted installation is actually easier for larger TVs because the TV is stable and at a fixed height. Ensure the mount is firmly secured before starting.
What if I misalign during installation? Lift the protector immediately — the static cling releases cleanly. Re-align and try again. You can re-apply multiple times without damage to the film or the TV panel.
How do I know if my screen is clean enough before applying? Look at the screen surface under a direct light at a 45-degree angle. Any dust or smears will be visible. Wipe again until the surface is completely clear under this inspection.
Does the installation void my TV warranty? No. Screen Guardian protectors use static cling with no adhesive — no chemical contact with the TV panel surface. No TV manufacturer’s warranty is affected by applying or removing a static cling screen protector.
Summary — Quick Reference
| TV size | People needed | Time | Key tip |
|---|---|---|---|
| 32 inch | 1 person | 10 min | Align top edge first |
| 43 inch | 1 person | 10 min | Align top edge first |
| 55 inch | 2 people recommended | 10–15 min | Person 2 confirms alignment from front |
| 65 inch | 2 people required | 15 min | Top-to-bottom lowering only |
| 75 inch | 2 people required | 15–20 min | Use cloth 2 for smoothing |
Ready to buy? Shop Screen Guardian TV Screen Protectors →
Related guides: How to Remove Air Bubbles from a TV Screen Protector · Anti-Glare vs Crystal Clear TV Screen Protector · Does Your TV Really Need a Screen Protector?

7 thoughts on “How to Install a TV Screen Protector — Step-by-Step Guide for All Sizes”
Pingback: Best LG TV Screen Protector India 2026 — OLED, QNED & LED Sizes
Pingback: Best 75 Inch TV Screen Protector India 2026 — Crystal Clear & Anti-Glare
Pingback: Best 50 Inch TV Screen Protector India 2026 — Crystal Clear & Anti-Glare
Pingback: Best Samsung TV Screen Protector India 2026 — QLED, Neo QLED & Crystal 4K
Pingback: Best Sony TV Screen Protector India 2026 — BRAVIA XR, X90L & X80L
Pingback: Best 43 Inch TV Screen Protector India 2026 — Crystal Clear & Anti-Glare
Pingback: Best TCL TV Screen Protector India 2026 — QLED, 4K & Android TV